
How to make crystal candy recipe with 3 ingredients? Growing up, my mother used to make this homemade treat for us every once in a while, and we used to look forward to it every time. Making crystal candy always felt a little like a magical kitchen experiment; with just three simple ingredients, my mother would make these delicious sweet treats in no time. I loved helping her make them, but of course enjoyed eating the candies more! Now, I make crystal candy in my own kitchen, and in this guide, I’ll share with you my mother’s recipe and the method so you can make it too. Let’s get started!
Crystal Candy Recipe (3 Ingredients)
Equipment
- saucepan
- wooden sticks or string
- clothespins or clips
- glass jars
- measuring cups
Ingredients
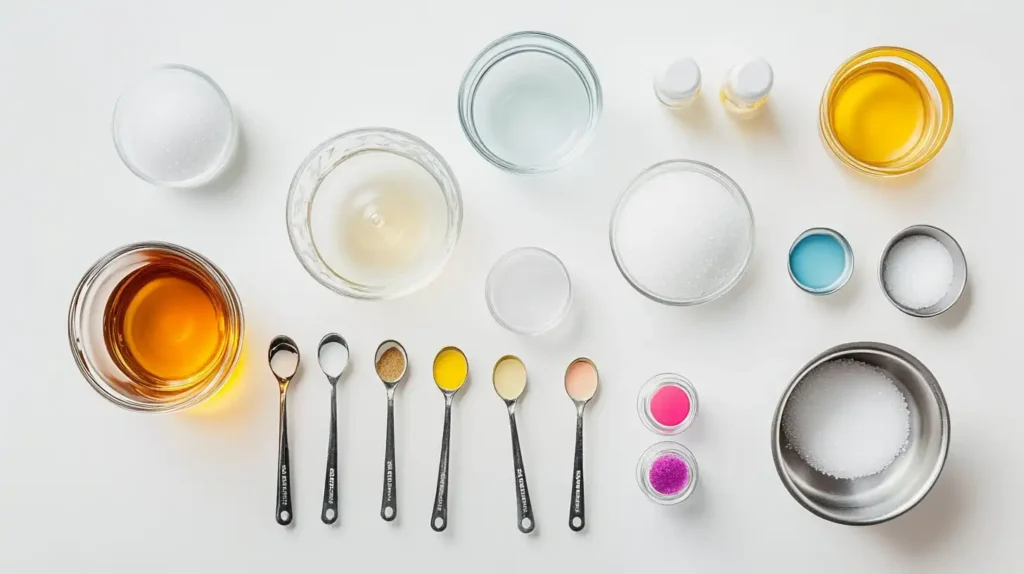
- 2–3 cups granulated sugar
- 1 cup water
- 1 tsp flavor extract (e.g. vanilla, peppermint) (optional)
Instructions
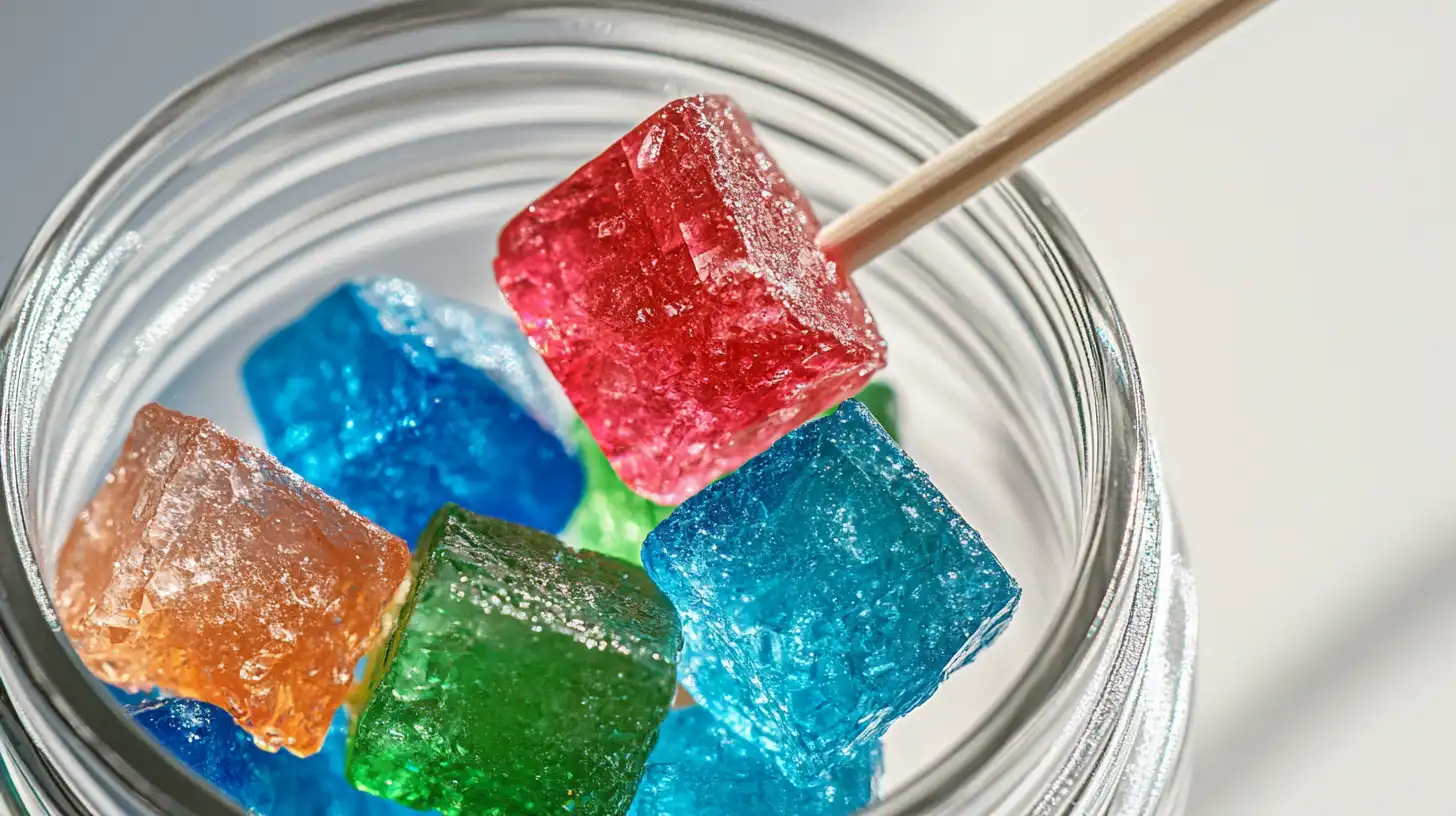
- Soak wooden sticks in water and roll in sugar. Let them dry completely. This creates a rough base to seed the crystals.
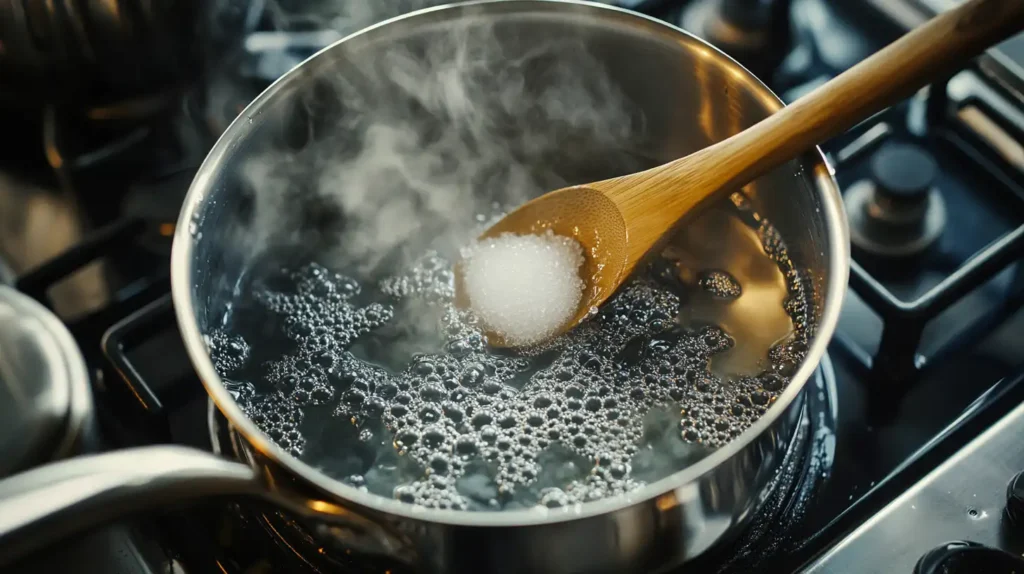
- In a saucepan, heat water until simmering. Gradually stir in sugar until it no longer dissolves, creating a supersaturated solution.
- Remove from heat and let cool slightly for 10 minutes. Add any food coloring or extract if using.
- Pour the solution into jars and suspend the sugared sticks in the center using clothespins across the rim.
- Place jars in a warm, undisturbed area. Let sit for 5–7 days until crystals have fully formed.
- Remove the sticks, allow them to dry fully, and store in airtight containers.
Notes
Nutrition
Choosing Ingredients for the Perfect Crystal Candy
Why Simplicity Matters in a Crystal Candy Recipe
Crystal candy—also known as rock candy—is surprisingly pure at its core. It’s made from a concentrated sugar solution that slowly cools and transforms into glittering edible crystals. Because there are only a few components involved, every ingredient matters. Choosing the right ones ensures your crystals form well, taste great, and look impressive.
Unlike traditional candy that requires thermometers and precision timing, crystal candy relies more on patience than perfection.
“The beauty of this recipe is its simplicity—you don’t need a candy shop to make sugar sparkle.”
The 3 Essential Ingredients You Already Have at Home
So, what do you actually need for this recipe?
| Ingredient | Purpose |
|---|---|
| Granulated sugar | Forms the crystals |
| Water | Dissolves and carries the sugar |
| Flavoring or food coloring (optional) | Adds fun and flavor |
That’s it. Just sugar and water are enough to get the job done. But if you want to make things more colorful or flavorful, you can throw in a few drops of vanilla extract, lemon, or even peppermint oil. Food coloring gives each crystal stick its own personality, too.
If you’re experimenting with fruity additions to your candy, consider how pineapple behaves in recipes. Learn more in our guide on is crushed pineapple good for you, especially if you’re thinking about adding natural fruit flavors to your crystals.
How Crystal Candy Works: The Science Behind the Sparkle
What Causes Sugar Crystals to Form?
Here’s where the magic meets the microscope. Crystals form through a process called crystallization. When you dissolve more sugar into hot water than it can hold at room temperature, you create a supersaturated solution. As this cools, the sugar molecules begin to stick together and form solid structures—aka crystals.
“Crystallization is nature’s version of slow cooking—except instead of flavor, it builds structure, sparkle, and beauty.”
If the solution stays undisturbed and the environment is right, those crystals start to build on a surface—like a stick, a string, or even the sides of your container.
How Temperature and Time Affect Crystal Growth
The speed and size of your crystal growth depend on two things: how saturated the solution is, and how slowly it cools.
- Hotter water holds more sugar, so crystals form better
- Slow cooling gives bigger, clearer crystals
- Rapid cooling or stirring can cause cloudy or misshaped candy
This is one of those “low and slow wins the race” kind of deals. The longer you let your crystals grow, the better they’ll look. Some people leave them for 5–7 days to get maximum sparkle.
Here’s a quick reference:
| Factor | Effect on Crystals |
|---|---|
| High sugar ratio | Bigger, more dramatic crystals |
| Warm environment | Faster growth, sometimes smaller |
| Cooler environment | Slower but clearer crystals |
| Stirring/disturbance | Smaller or cloudy crystals |
Step-by-Step Crystal Candy Recipe (With Only 3 Ingredients)
Now that we’ve covered the how and why, let’s actually make some sweet, edible jewels. This is a fun project to do on a weekend afternoon, especially if you want to let kids get involved.
How to Prep Your Tools and Workspace
Here’s what you’ll need:
- A saucepan
- Wooden skewers or string
- Clothespins or binder clips
- Tall jars or glasses
- Measuring cups
- Optional: food coloring, extract, paper towels
Before you start cooking, soak your wooden sticks in water and roll them in sugar. Let them dry completely. This gives the crystals a rough surface to start forming on—it’s like giving them a head start.
Cooking and Pouring the Sugar Solution
The magic ratio here is 2 cups of sugar for every 1 cup of water. Here’s how it goes:
- Heat the water in a saucepan until it simmers
- Gradually add sugar, stirring constantly until fully dissolved
- Keep adding sugar until no more dissolves—this creates your supersaturated solution
- Remove from heat and let it cool slightly (about 10 minutes)
- Add flavoring and food coloring if desire
Carefully pour the solution into clean jars. Place your pre-sugared sticks into the center of each jar, held in place by a clothespin across the top.
Now the hard part—waiting. Put the jars somewhere safe and undisturbed, like a countertop or cupboard.
“The longer they sit, the more stunning they get. Crystals need time to bloom—kind of like your best ideas.”
Wondering about ingredient prep timing? It’s similar to other techniques like do you thaw frozen cranberries before baking, where the temperature and timing affect the final texture—just like how cooling affects your crystal candy.
How to make crystal candy at home
To make your own crystal candy, all you need is sugar, water, and a bit of time. Start by heating one cup of water in a saucepan over medium heat. Slowly stir in two to three cups of granulated sugar until it completely dissolves, forming a thick, clear syrup. Once no more sugar will dissolve, remove the pan from heat and let it cool for a few minutes. For extra flavor and flair, add a drop of food coloring and your favorite extract, like peppermint or vanilla. Pour the syrup into clean jars, and lower in prepped sticks or strings (dipped in water and rolled in sugar earlier). Secure them in place with clothespins balanced across the jar rims. Now comes the fun part: watching the crystals grow! Set your jars somewhere warm and undisturbed, and within a few days, you’ll start to see magical crystals forming—just like science class, but tastier.
Creative Ways to Customize Your Crystal Candy
Once you’ve mastered the basic crystal candy recipe, it’s time to get creative. The simplicity of this treat makes it the perfect canvas for flavor, color, and fun presentation.
Fun Flavors and Natural Food Coloring Ideas
Want to make your candy not just pretty but tasty, too? Flavorings are your best friend. Just a drop or two of extract can completely transform your crystals into something magical.
Here are some fun flavor + color combos:
| Flavor | Suggested Food Coloring |
|---|---|
| Peppermint | Red or Green |
| Vanilla | Blue or White |
| Lemon | Yellow |
| Raspberry | Pink |
| Grape | Purple |
Natural food colorings from beet juice, turmeric, or butterfly pea flower can also be used if you’re avoiding synthetic dyes.
“Crystals don’t just shine—they speak. Their colors tell a story, and the flavor is the twist at the end.”
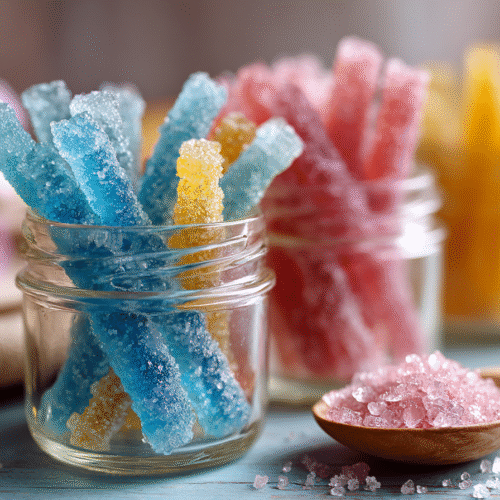
Using Different Sticks, Strings, or Molds
Traditionally, crystal candy grows on wooden sticks or strings, but don’t be afraid to mix it up. Try:
- Cotton string tied to a pencil for a nostalgic rock candy style
- Lollipop sticks for a more modern finish
- Molded forms like cookie cutters for themed designs
You can even create rainbow crystal bouquets or name-tagged party favors. The flexibility of this recipe makes it perfect for holidays, birthdays, and even science fairs.
Looking for seasonal inspiration? Our flavorful orange ginger cranberry sauce could inspire a fun twist on color and taste for holiday-themed rock candy creations.
How to Store and Display Crystal Candy
Once your crystals have fully formed (about 5–7 days for big growth), carefully remove the sticks and let them air dry for a few hours. This keeps them from sticking together when stored.
Best Ways to Store for Maximum Crunch
Humidity is your enemy here, so keep the candy in a dry, airtight container. If you live in a humid climate, toss in a small packet of food-safe silica gel or some dry rice wrapped in a paper towel to absorb moisture.
Keep them:
- In mason jars with tight lids
- In treat bags tied with ribbon
- In candy tins with dividers
Cool Ways to Gift or Showcase Your Homemade Cand
Crystal candy is as beautiful as it is tasty. Here are some fun ideas for presenting it:
- Add name tags and use as place settings for parties
- Wrap them in clear bags for holiday gifts
- Create a rainbow bouquet for birthdays
- Package in test tubes with a little science-themed tag
Troubleshooting Common Crystal Candy Problems
Even though this recipe is simple, things can go sideways. Don’t worry—it’s all fixable.
Why Aren’t My Crystals Growing?
If days go by and nothing happens, here’s what to check:
| Problem | Possible Cause |
|---|---|
| No crystals forming | Solution wasn’t saturated enough |
| Cloudy or small crystals | Stirring too much or cooling too fast |
| Crystals growing in jar only | Stick not rough or seeded with sugar |
| Candy too sticky | Didn’t dry long enough after forming |
Try reheating your solution, adding more sugar, and starting again with a fresh jar and prepped stick.
How to Fix Sticky, Cloudy, or Broken Crystals
Sticky crystals need more drying time. Cloudy crystals can be caused by impurities in the sugar or rapid cooling. If your crystals break, don’t toss them—use them as edible glitter for decorating cookies or cupcakes.
“Failure in candy making isn’t a waste—it’s just a crunchy step toward sweet success.”
Fun Facts and Safety Tips for Making Rock Candy at Home
Is Crystal Candy Safe for Kids to Make?
Absolutely—but with adult supervision. Boiling sugar can cause burns, so grown-ups should handle the heating part. But kids can:
- Prep the jars
- Add color and flavor
- Observe crystal growth like a science experiment
- Record changes day by day
This makes it a perfect rainy-day project or homeschool activity.
Sweet Science: How This Candy Teaches Chemistry
Here’s a fun bonus—this isn’t just dessert, it’s STEM learning. This project teaches:
- Solubility
- Saturation
- Crystallization
- Patience and observation
It’s a sugary lesson in how matter changes forms and why temperature matters in chemical reactions.
Frequently Asked Questions
How do they make crystal candy?
Crystal candy is made by dissolving sugar in hot water to create a supersaturated solution. Once cooled and left undisturbed, sugar crystals form on sticks or strings over several days.
What are the ingredients in edible crystals?
The main ingredients are sugar and water. Optional ingredients include flavor extracts and food coloring for variety.
How to grow crystal candy?
You grow crystal candy by placing a stick or string in a jar of supersaturated sugar solution and letting it sit for 5–7 days in a still, room-temperature space.
What is used to form crystals in candy making?
Sugar molecules bond together during cooling to form solid crystals. The structure begins when sugar molecules find a rough surface to cling to, like a sugared stick or string.
Conclusion: Make Sweet Magic at Home with This Easy Crystal Candy Recipe
Making crystal candy always feels like a science experiment. From watching the sugar dissolve to watching it crystallize into a sweet treat, the entire process is magical. This recipe is perfect for fun experimenting, gift-giving, or just an easy-to-make candy. Regardless of why you’re making it, crystal candy is one of the best treats to add a little sweetness, and sparkle, to your day. So, give it a try in your own kitchen, and share with me below just how much the process and the result managed to captivate your attention. I can’t wait to hear how much you enjoyed it, just as I did when my mom made it for me when I was younger!
Table of Contents

Crystal Candy (Rock Candy)
Equipment
- wooden skewers or cotton string
- tall jars or glasses
Ingredients
- 2 cups granulated sugar
- 1 cup water
- 1-2 drops food coloring optional
- 1/2 tsp flavoring extract vanilla, lemon, peppermint, etc., optional
- extra sugar for coating sticks
Instructions
- Prep the Sticks: Soak wooden skewers in water, then roll in granulated sugar. Let dry completely to create a crystal “starter” surface.
- Make the Sugar Solution: In a saucepan, bring 1 cup water to a simmer. Slowly stir in 2 cups sugar until completely dissolved. Keep adding sugar until it no longer dissolves—this creates a supersaturated solution.
- Cool & Add Color/Flavor: Remove from heat. Let cool for 10 minutes. Stir in food coloring and flavoring extract, if using.
- Fill Jars: Pour the sugar solution into clean jars or glasses. Place one prepared stick into the center of each jar, secured with a clothespin across the top to hold it upright and suspended
- Let Crystals Grow: Set jars in a cool, undisturbed area. Watch crystals form over 5–7 days. The longer they grow, the bigger they get!
- Finish: Once crystals reach desired size, remove sticks and let dry for a few hours. Store in an airtight container.
Notes
- Best Flavor Ideas: Peppermint (red or green), Lemon (yellow), Vanilla (blue), Raspberry (pink), Grape (purple).
- Natural Coloring Options: Beet juice (red), turmeric (yellow), butterfly pea flower (blue).
- Pro Tip: Crystals grow best in a quiet, cool space. Avoid moving or disturbing the jars during growth.
- Storage: Keep finished candy in an airtight container away from humidity. Add rice or a silica gel pack to absorb moisture.
- Kid-Friendly: Let children help with coloring and flavoring choices and check progress daily—it’s a tasty science lesson!